HOW TO CORRECTLY REBUILD A CHIMNEY
Not all chimneys need a full rebuild. 90% of the ones we see just need a good tune up with tuck pointing the holes, cracks and gaps with a chimney cap refurbishment and some waterproofing on the top and sides of the chimney. This is significantly less cost than a rebuild. Below we will explain how to correctly rebuild a chimney to like new condition.
In order to properly rebuild a chimney we must seal all 3 areas of the chimney. The top of the chimney chase, the brick and mortar in the middle, and the flashing at the bottom of the chimney where it meets the roof. All 3 areas must be perfectly sealed in order to stop water from getting in. If left unattended this small drip type leak will not be detected until a lot of damage is done. It will damage the internal components of the fireplace, and in some cases cause mold in the home.
Most of these damages will not exceed the home owners deductible, so it will be all out of pocket expenses. It is much cheaper to rebuild the chimney properly than to remediate the damages done by not fixing it properly. We will walk you through the correct wat to rebuild a chimney step-by-step from the top to the bottom. This is a chimney we rebuilt that numerous roofers and contractors recommended tearing the chimney down.

Before

After
TOP OF THE CHIMNEY
Power Wash

REMOVE OLD CONCRETE CAP WITH CHISELS OR CHIPPING HAMMER

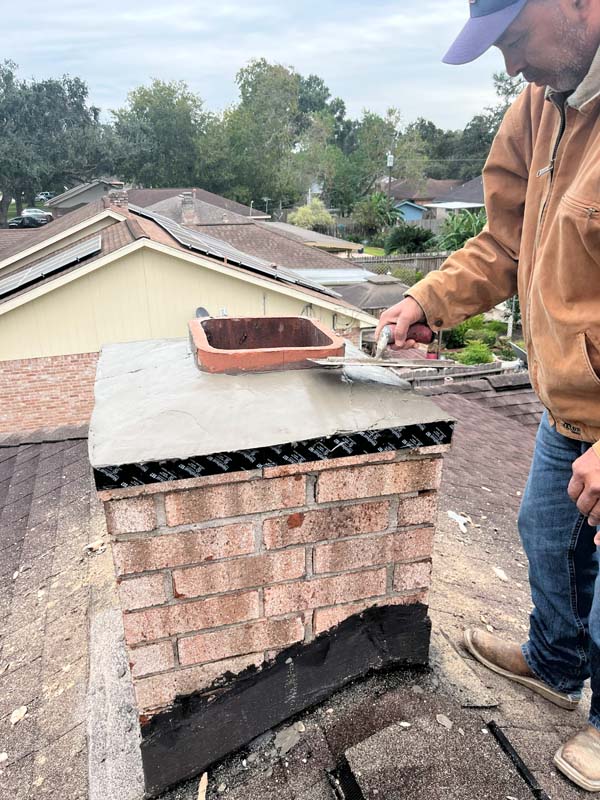
BUILD OUT NEW CONCRETE CAP OR INSTALL STAINLESS STEEL CAP


Another very good more expensive option is to install a stainless steel chase as shown here.
MIDDLE OF THE CHIMENY
BEGIN TUCK POINTING AND REBUILDING BROKEN BRICKS

If necessary we will rebuild any broken bricks and stain them to match.

RUN A JOINTER IN BETWEEN THE BRICKS FOR A SMOOTH EVEN FINISH

BRUSH OFF ALL THE MORTAR JOINTS TO REMOVE EXCESS MORTAR

ACID WASH TO REMOVE ALL EXCESS MORTAR FROM BRICK

STAIN BRICKS TO MATCH IF NECESSARY

APPLY 2 COATS OF SILICONE SEALANT TO THE CHIMNEY CAP


APPLY WATERPROOFING TO CHIMNEY


BOTTOM OF CHIMNEY
FLASHING WHERE THE ROOF MEETS THE CHIMNEY
We first remove all the flashings and the rotten wood on the roof deck.


The next step is to install step flashing on the sides of the chimney.

We then cut small lines in the brick where we will tap the lip of the counter flashing into the brick causing a watertight seal all the way around the chimney.


If you look closely you can see we use Long Life Metal To Wood Stainless Steel Screws with 1/4 inch rubber gaskets to attach the metal to the roof. Then we paint the metal to match. There you have the absolute perfectly built and sealed chimeny.
